Getting to know the SDL Trados Studio interface - Part 1
In this post, we'll start exploring the SDL Trados Studio interface.
PREVIOUS POST < || > NEXT POST
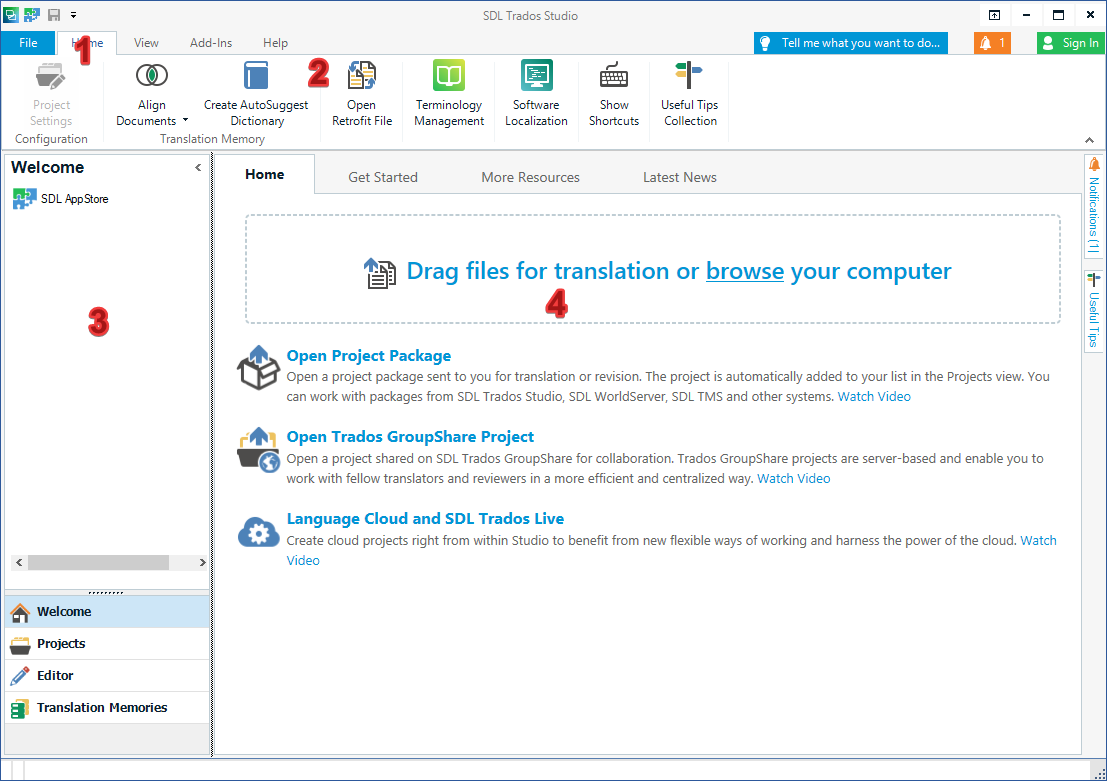
The SDL Trados Studio interface includes several areas:
- (1) Quick access toolbar. The toolbar can be customized to your liking.
- (2) Ribbon, which provides access to the main functions of the application. The available functions change depending on the selected section in the navigation area.
- (3) Navigation area on the left side. The navigation area allows you to download applications of interest from the SDL AppStore portal as well as navigate between sections providing access to the main functions of the program.
- (4) Center area. The data in the central area changes depending on selectable sections in other areas (e.g. ribbon or navigation area).
Quick Access Toolbar
The quick access toolbar provides access to the most commonly used commands. By default, this
toolbar is located above the ribbon in the upper left corner of the working window. If necessary,
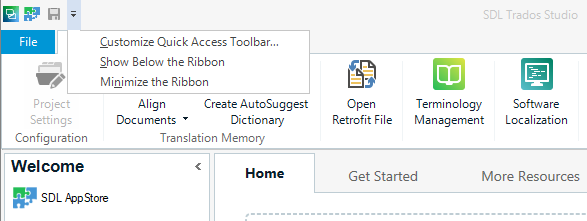
you can place it below the ribbon. To do this, click the ![]() icon
and select the Show Below the Ribbon entry from the list.
icon
and select the Show Below the Ribbon entry from the list.
Depending on the selected section in the application, the quick access toolbar may contain different commands. For example, when working with a document in the Editor section, the toolbar looks like this.

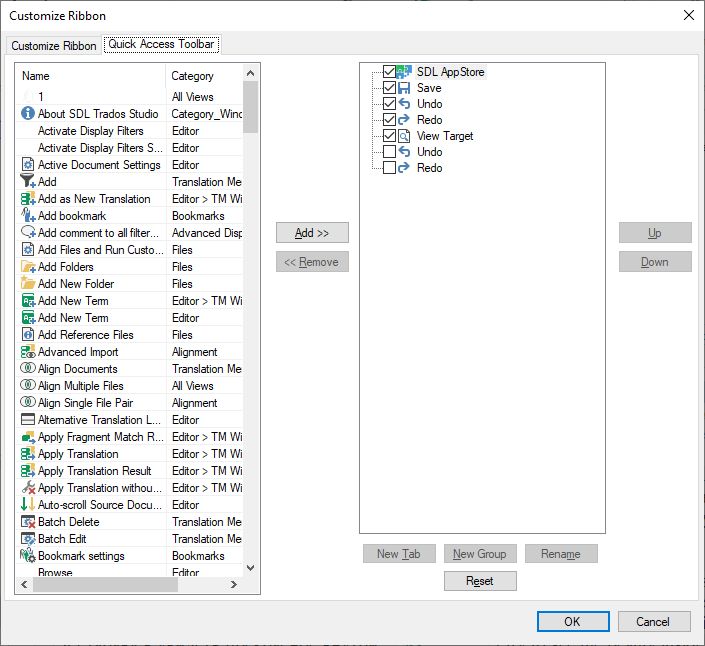
You can customize the quick access toolbar to your liking by adding commands that you use most often when working in SDL Trados Studio. You can also place commands here that are not available in other areas (for example, on the ribbon). To customize the panel, perform the following operations:
-
Click the
 icon in the upper left corner of the working window.
 -
Click on the Customize Quick Access Toolbar option in the list that opens.
- The Customize Ribbon window opens.
-
Make sure that the Quick Access Toolbar tab is selected.
-
Select in the left part of the window the command you want to add to the quick access toolbar.
-
Click the Add button.
- The command is displayed on the right side of the window.
-
Optional: Select the command on the right side of the window and use the Up and Down buttons to set the position of the new command in the quick access toolbar.
-
Click the OK button.
-
The window for customizing the ribbon closes.
-
The added command is displayed in the quick access toolbar.
Removing a command from the quick access toolbar is also done in the Customize Ribbon window. To do this, select the appropriate command in the right area of the window and click the Remove button.

PREVIOUS POST < || > NEXT POST