Microsoft Azure - hosting a static website
This post describes how to configure Microsoft Azure to host your static website.
About static websites
A static website is a site that consists of static HTML pages. It usually contains HTML text, images, and multimedia content (audio, video, etc.) and can also include some CSS and JavaScript. For more information about static websites, see https://en.wikipedia.org/wiki/Static_web_page.
When you create a static site, you get a collection of static assets that you need to upload to a web server to make your content available to the public. This is where cloud service providers like Microsoft Azure come in. The Blob Storage service - which is part of Microsoft Azure - allows you to upload your static site files to the cloud and host them there.
These are the steps you need to take to deploy a static website on Microsoft Blob Storage:
- Create a storage account
- Enable static website hosting
- Upload your content to the static site
- Check that your static site is available to the public
In this article, we assume that you have an active subscription with Microsoft Azure. See https://azure.microsoft.com/en-us/free/ for more information.
Creating a storage account
In the first step, we need to create a storage account in Microsoft Azure:
-
Sign in to the Azure portal.
-
Click in the search field, enter Storage accounts, and press Enter.
- The list of services in Microsoft Azure is displayed.
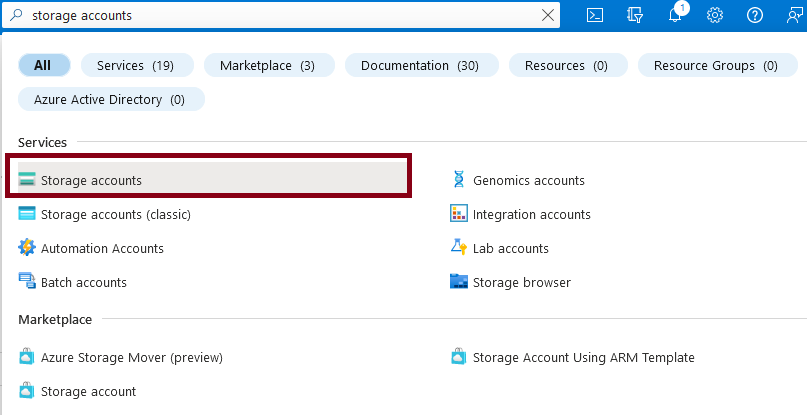
- In the Services section, click on the Storage accounts entry.
- The Storage accounts page opens.
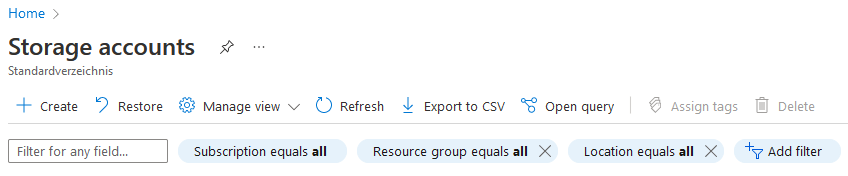
- Click on the + Create button.
- The Create a storage account page opens.
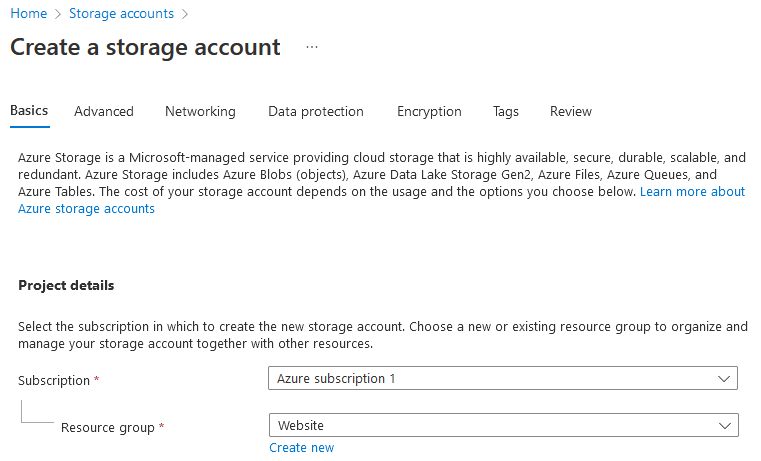
- Fill in the following fields:
- Subscription: Select your Azure subscription.
- Resource group: Select the Website entry, or create a new resource group with any name you like.
- Storage account name: Enter the name for your storage account. This name must be unique across all your storage accounts. It may contain only numbers and lowercase letters (e.g., mylocalstorage01).
- Region: Choose the appropriate region for your storage.
- Performance: Leave the Standard option selected.
- Redundancy: Let's take the cheapest Locally-redundant storage (LRS) option. You usually host the content of your static site locally or in some remote repository (e.g., in GitHub) and can quickly re-upload it to Azure if something goes wrong.
-
Click on the Review button at the bottom of the page.
-
Review the made settings and click on the Create button.
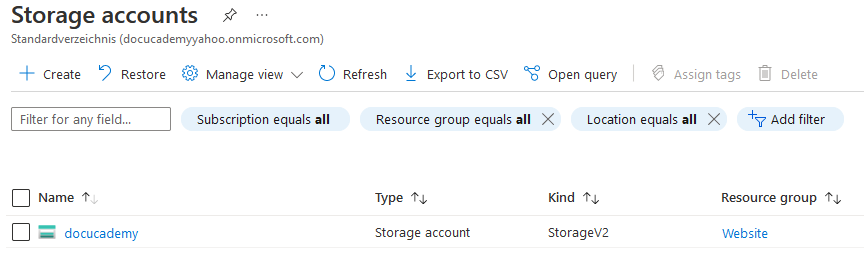
- The storage service is created.
Enabling static website hosting
Now we need to enable the Static website hosting feature on the storage account because this feature is disabled by default in Microsoft Azure.
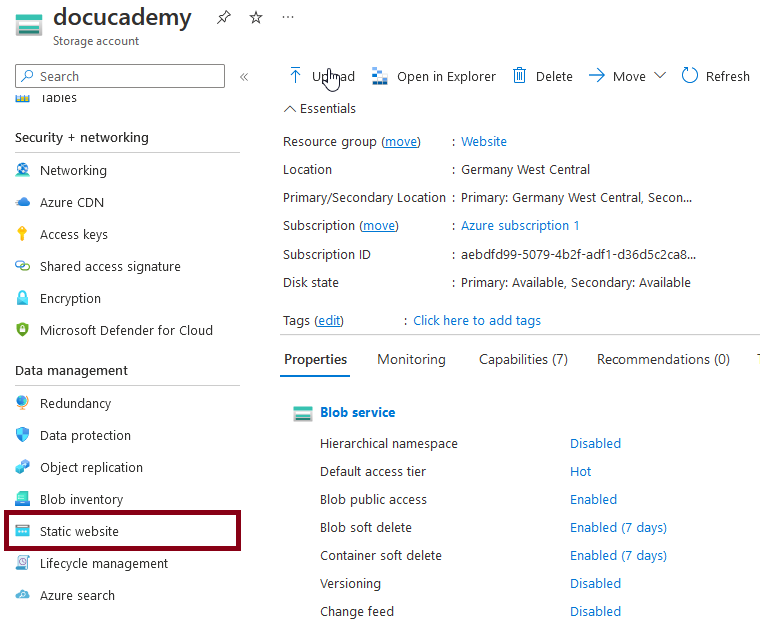
- Click on your account name (docucademy in our example).
- The account overview page opens.
- In the left navigation, go to the Data management section and click on the Static website entry.
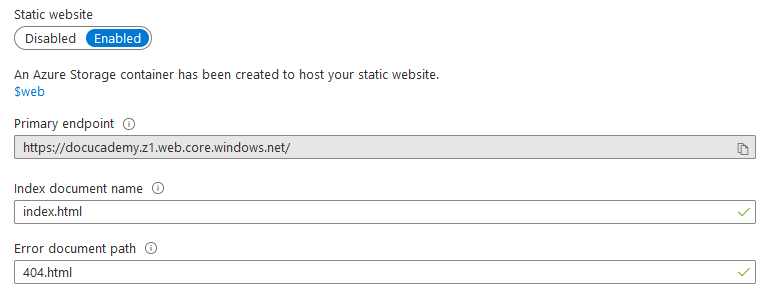
- In the Static website section, click on the Enabled button.
- The static website feature is enabled.
- Two additional fields are displayed.
- Enter the following information in the displayed fields:
- Index document name: Type in the name of your website's default page (usually index.html). The default index page is displayed when a user navigates to the root of your static website (e.g., www.example.com).
- Error document path: Type in the name of your website's error page (usually 404.html). The default error page is displayed when a user attempts to navigate to a page that does not exist on your static website.
- Click on the Save button.
- Your settings are saved.
- A blob storage container with the name of $web is created. This container will store your website files.
- A confirmation message is displayed. Your static website endpoints and other configuration information are shown within the Overview pane.
Uploading content to the static site
In the next step, you'll upload the content of your static site to the Azure blob storage container:
- In the left navigation of your storage service, click on Storage browser - Blog containers - $web.
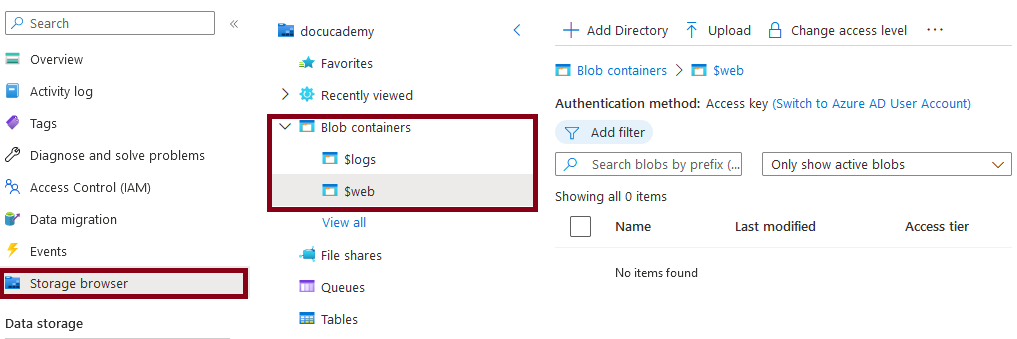
- Click on the Upload button in the right part of the page.
- The Upload blob page opens.
- Create at least two HTML pages: index.html and 404.html. Just open your favorite text editor and use the text below to create these two files.
-
index.html
<!DOCTYPE html> <html> <head> <title>My first page</title> </head> <body> <h1>This is my new static website!</h1> </body> </html> -
404.html
  <!DOCTYPE html>
  <html>
      <head>
          <title>Error</title>
      </head>
      <body>
          <h1>This is my error page!</h1>
      </body>
  </html>
-
Navigate to your files using the Browse for files link.
-
Click on the Upload button.
- Your files are uploaded to the $web blob storage container.
Checking your static website
Finally, you can check that the files have been successfully uploaded to Microsoft Azure and can be accessed on the Internet:
-
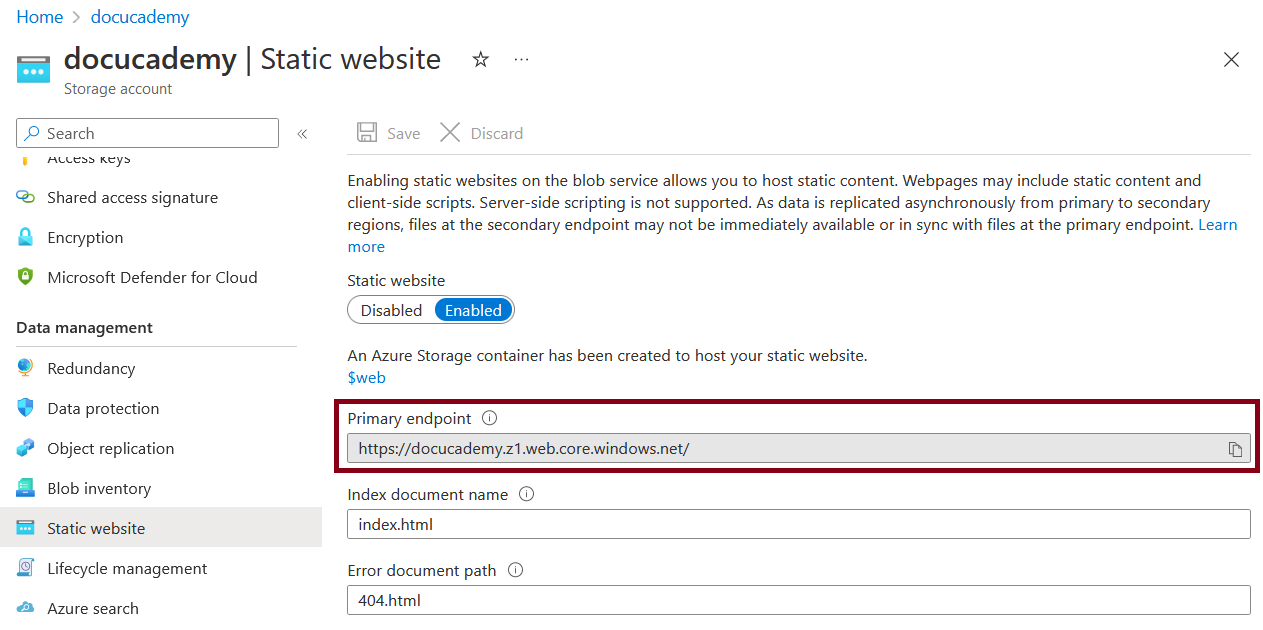
Navigate to the Data management section of your storage and click on the Static website entry.
-
Copy the URL displayed in the Primary endpoint field.
- Enter the copied URL in your browser and press Enter.
- The content of your uploaded index.html file should be displayed in the browser window.
- Append /404.html to the URL and click Enter.
- Now the content of the uploaded 404.html file should be shown.
So, where to go next? You may now wish to set up a custom domain name for your static website or configure Azure Content Delivery Network (CDN) to deliver your content globally. We'll discuss this in more detail in one of our next articles.