Editing the screencast - deleting a fragment
In this post, we'll continue editing our screencast. Today, you'll learn how to remove a fragment from your screencast.
PREVIOUS POST < || > NEXT POST
While recording our screencast, we purposely made a short pause of 3 to 5 seconds after step 3 in the script. Such a pause may be necessary, for example, if you want to take a sip of water or if you need to clear your throat.
As a result of the pause, our screencast contains an empty fragment. To delete this fragment, do the following:
-
Move the slider on the timeline to the location where the pause begins.
-
Click the red marker to the right of the slider and drag the marker to the place where the pause ends. Your window should look like this:
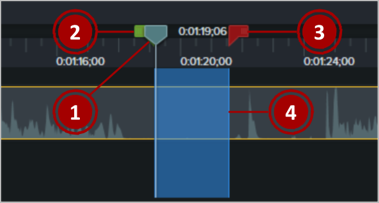
(1) Slider
(2) Green marker to the left of the slider
(3) Right marker to the right of the slider
(4) Selected area
-
If necessary, adjust the position of the right marker. You can also use the green marker to the left of the slider to change the initial position of the selection.
-
Right-click the highlighted fragment and choose Ripple Delete from the context menu.
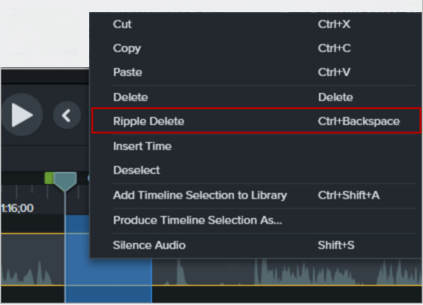
- The selected fragment is deleted from the screencast.
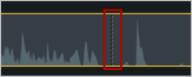
- The left and right parts of the screencast are glued together and a vertical dotted line is displayed at the deletion point.
- If you are satisfied with the result, save the project by clicking Save in the File menu.
Difference between Ripple Delete and Delete
To delete a fragment, you can use the Delete option (also available from the context menu) instead of Ripple Delete. In that case, however, after deleting the fragment, the left and right parts of the screencast are not glued together and an empty space is left between them.
When viewing the screencast, that empty space is displayed as a black screen. Therefore, after deleting the fragment with the Delete option, you should manually glue both parts of the screencast or fill the empty space with some other content (e.g., add a slide or another video clip).
PREVIOUS POST < || > NEXT POST