Recording the screencast
In this post, we'll create a new screencast using the Camtasia application.
PREVIOUS POST < || > NEXT POST
Once you have configured all the necessary settings, you can start recording your screencast.
-
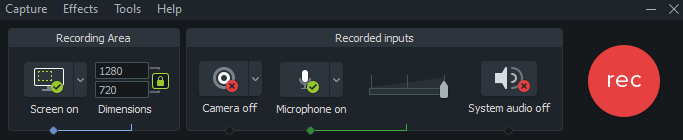
Start the Camtasia Recorder if it is not already running.
-
Make sure that the Camtasia Recorder and Microsoft Edge are configured for recording.
-
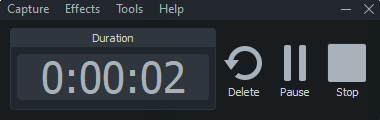
Click the rec button on the right side of the Camtasia Recorder window.
- The recording starts, which is indicated by a flashing green recording area frame.
- The view of the recording panel changes, giving access to information about the recording duration and buttons to control the recording process. For example, you can delete the current recording or pause it for a while.
-
Count to 5.
-
Record the screencast using our script link (PDF file). For a more convenient recording process, you can use two monitors. On one monitor, you can perform the recording and on the other one, you can open the script text.
-
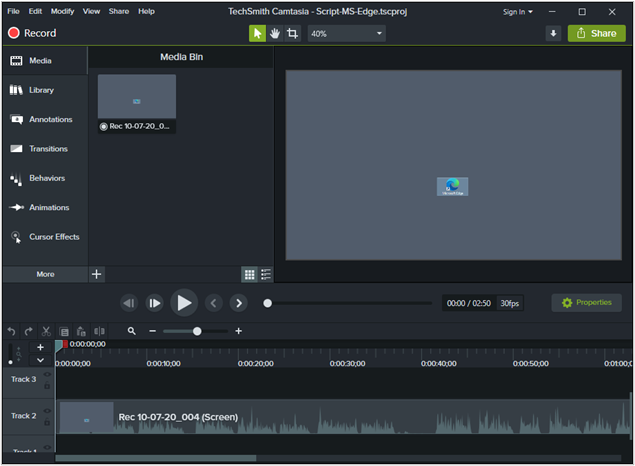
Once you have finished reading your script text, count to 5 again and click the Stop button or press the F10 key on your keyboard.
- The recording stops.
- A window opens where you can enter a name of the video file and specify its location.
- Enter the desired name and save the file, for example, in the default folder. Later we'll move it to a special repository. We'll use this repository to work with all the resources of our project.
- The recorded video opens in the main Camtasia window.
PREVIOUS POST < || > NEXT POST